Date Last Updated: 02-06-2014
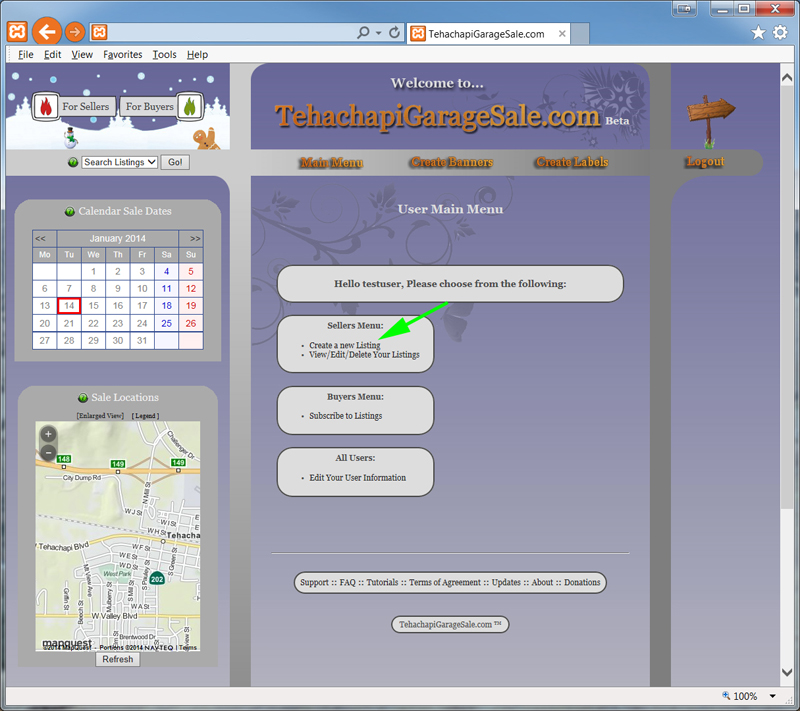
Step 1:
- Login to your user account.
- Arrive at the User Main Menu.
- Click on the "Create a new Listing" link in the Sellers Menu.
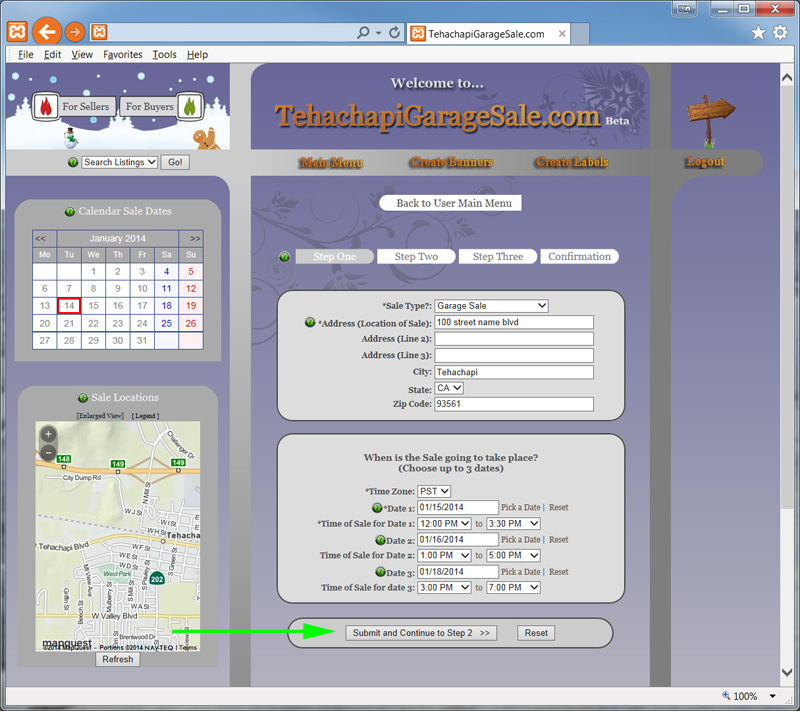
Step 2:
- Arrive at Step One, this is the most important page.
- Select your Sale Type.
- Enter the street address or cross streets. You may need to select your City, State, and Zip Code.
- Select at least one date and the respective time that the event will take place.
- You may select up to 3 dates.
- When you are done, click on the "Submit and Continue to Step 2" button.
Step 3 (Top Half):
- Arrive at Step Two.
- Enter a short description in the top text box.
- (Optional) Enter a more detailed description in the second text box.
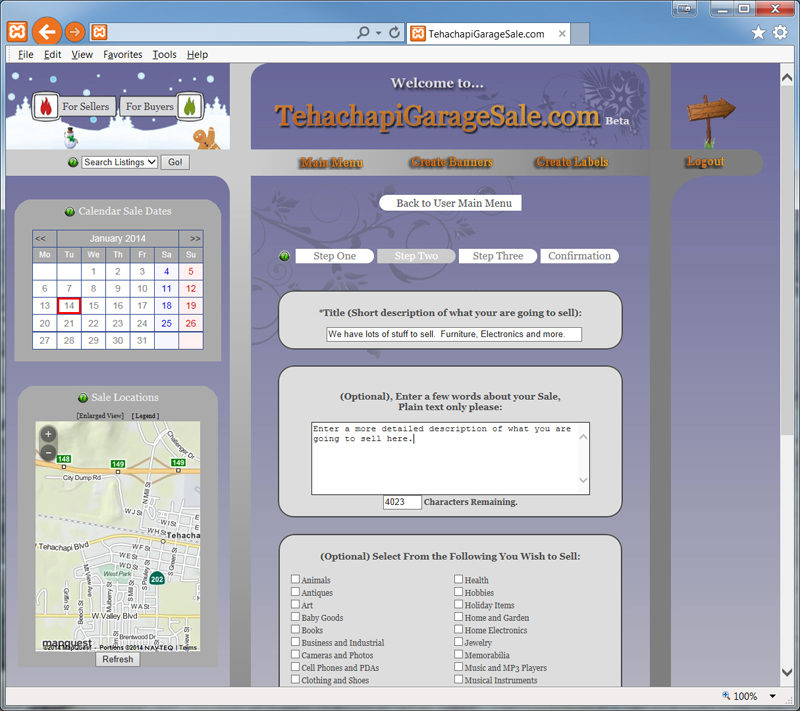
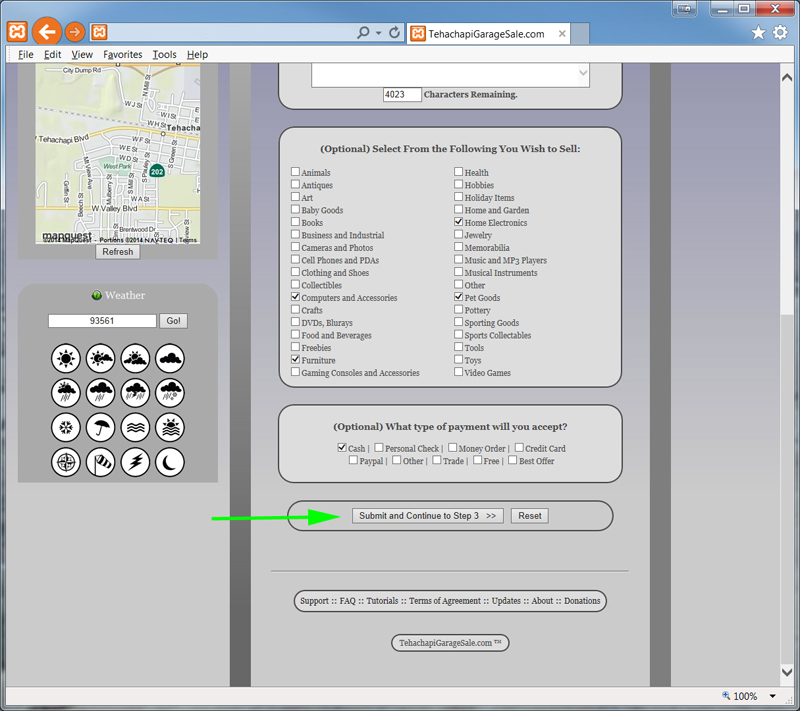
Step 3 (Bottom Half):
- (Optional, but highly recommended) Select the items you are going to sell.
- (Optional) Select the payment types you will accept.
- When you are done, click on the "Submit and Continue to Step 3" button at the bottom of the page.
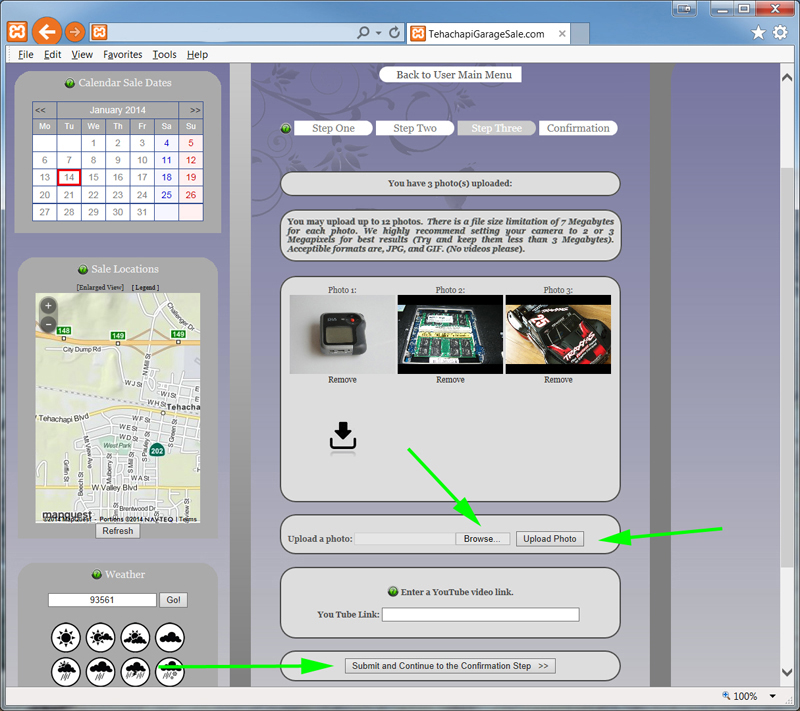
Step 4 (optional):
- Arrive at Step Three.
- If you have any photos, you may upload them here.
-
You can upload up to 12 photos with a limitation of 7 megabytes each.
Please note this limitation when taking photos with your camera. - To upload photos, click the "Browse" button and select your photo (You can select only one at a time).
- Click on the "Upload Photo" button and wait for the image to be displayed in the preview box above.
- Repeat this process for all the photos you wish to upload.
- If you have a Youtube video, you may enter it in the text box at the bottom of the page.
- When you are done, click on the "Submit and Continue to the Confirmation Step" button.
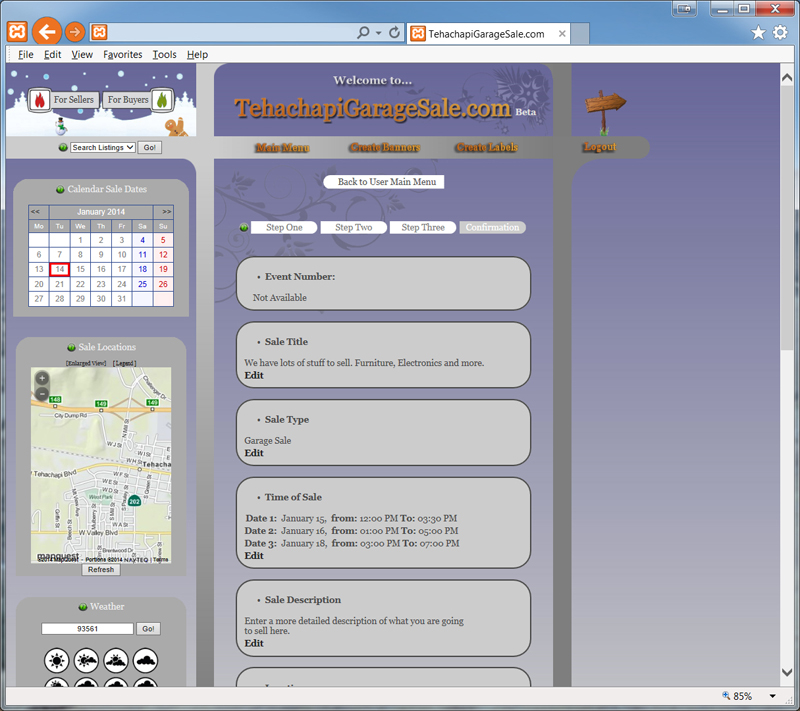
Step 5 (Top Half):
- Arrive at the Confirmation Page.
- The confirmation step will display all of the data you've entered.
-
This page allows you to go back and make changes by either clicking on the step number,
or the "Edit" button in each data block.
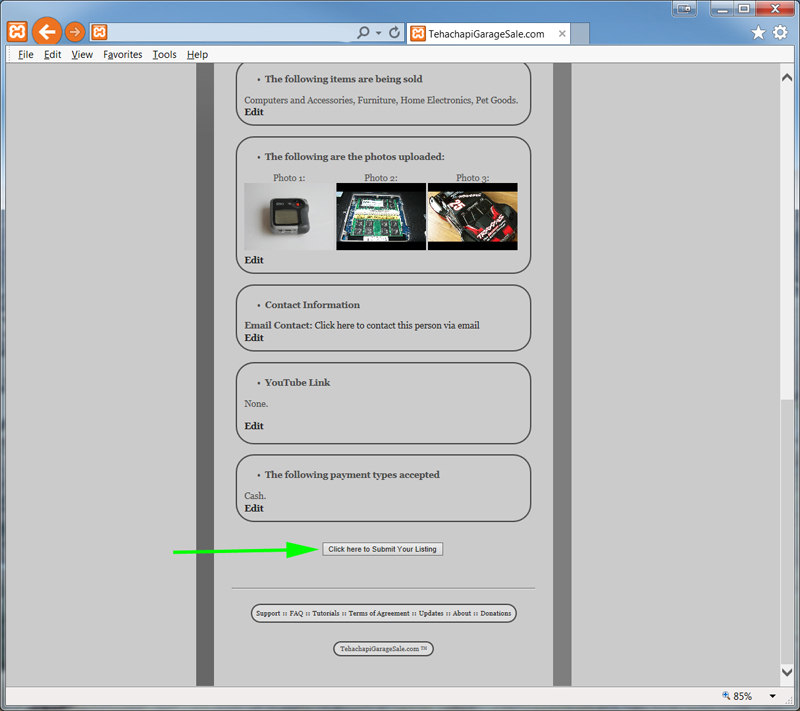
Step 5 (Bottom Half):
-
If you are satisfied with the information you provided,
scroll down to the bottom of the page and click on the "Click here to Submit Your Listing" button.
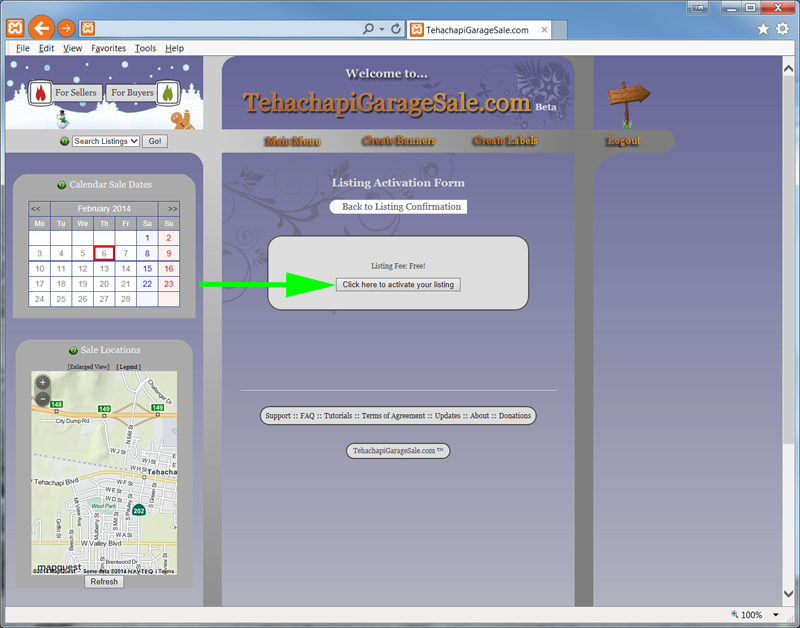
Step 6:
- Arrive at the Listing Activation Form page.
- When the site goes into production, you will be required to pay a modest fee to post the listing.
- For now, while we are in the Beta phase, you may post your listing for free.
- Click on the "Click here to activate your listing" button.
-
Please note, you still have the option to go back and make changes
by clicking on the "Back to Listing Confirmation" button at the top of the page.
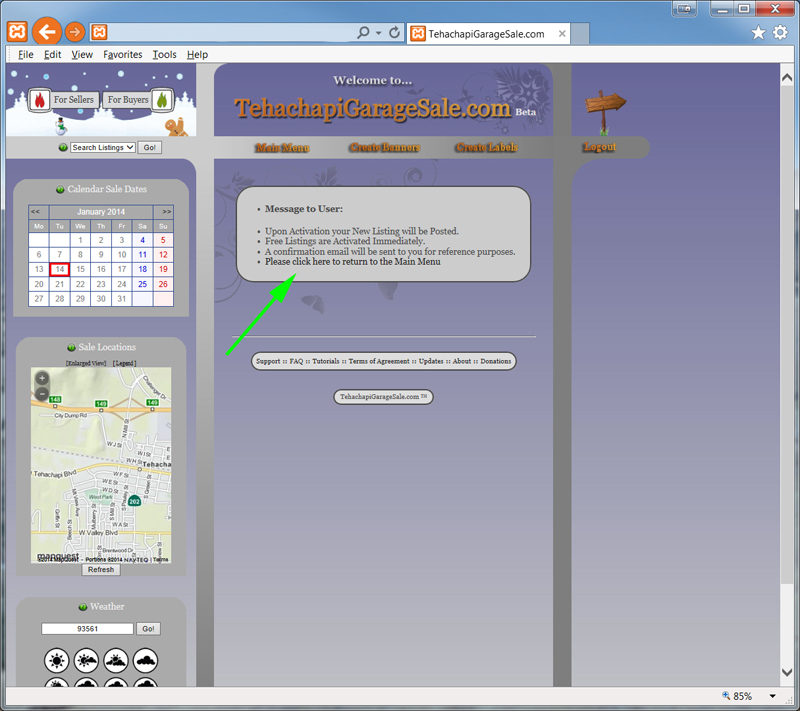
Finish:
- Congratulations! Your listing has been activated!
- A confirmation email will be sent for reference purposes.
- Click on the link at the bottom of the Message to User box in order to return to the User Main Menu.